Quick Start
This guide walks you through the initial setup wizard, server configuration, and everyday usage of the Expression Lab console.
Before accessing the console, you must complete the onboarding wizard and add the generated configuration constants to your wp-config.php file.
Onboarding Wizard (Initial Setup)
Navigate to Tools > Console (or Network Admin > Settings > Console in WordPress Multisite).
If the plugin is not yet configured, the onboarding wizard will launch automatically.
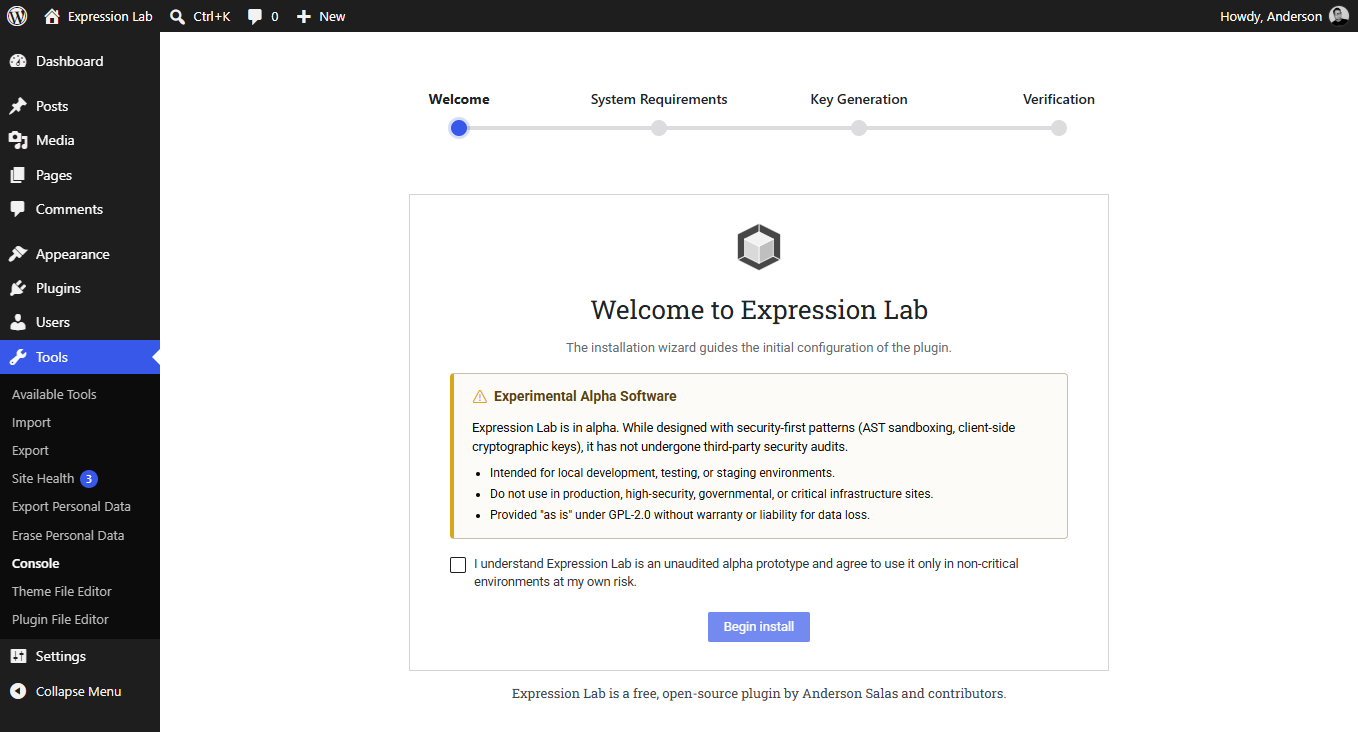
Welcome & Acknowledgement
Review the terms of use and check the confirmation box.
System Requirements Check
The wizard automatically checks your server and browser environment. If any required requirement is marked as Missing, resolve it in your server configuration (see Requirements) before continuing.
Key Generation & Passphrase
Enter a strong passphrase (minimum 8 characters):
- Client-side derivation: Your private key is derived locally in your browser using Argon2id and Ed25519.
- In-memory session key: Neither your passphrase nor the private key is stored in the database or written to disk; the key resides only in browser memory during your active session.
Because the passphrase is never stored on the server, there is no way to recover or reset a forgotten passphrase. If you lose your passphrase, you must delete the configuration constants from wp-config.php and complete the onboarding wizard again.
Server Ownership Verification
The wizard generates three PHP constants that must be added to your wp-config.php file:
define( 'EXPRESSION_LAB_ADMIN_USER_ID', 1 );
define( 'EXPRESSION_LAB_ADMIN_PUBLIC_KEY', 'your-base64-public-key...' );
define( 'EXPRESSION_LAB_ADMIN_SALT', 'your-base64-salt...' );
- Open
wp-config.phpon your server. - Paste the three lines before the
/* That's all, stop editing! Happy publishing. */comment. - Save the file and reload the Expression Lab admin page.
Once WordPress detects all three constants, the plugin completes installation and unlocks access to the console.
Accessing the REPL Console
Single Administrator Restriction
Access to the interactive console is restricted to the administrator whose ID matches EXPRESSION_LAB_ADMIN_USER_ID.
Other users can see the plugin entry in the WordPress admin menu, but accessing the page will display an Access Restricted notice and prevent any console operations or evaluations.
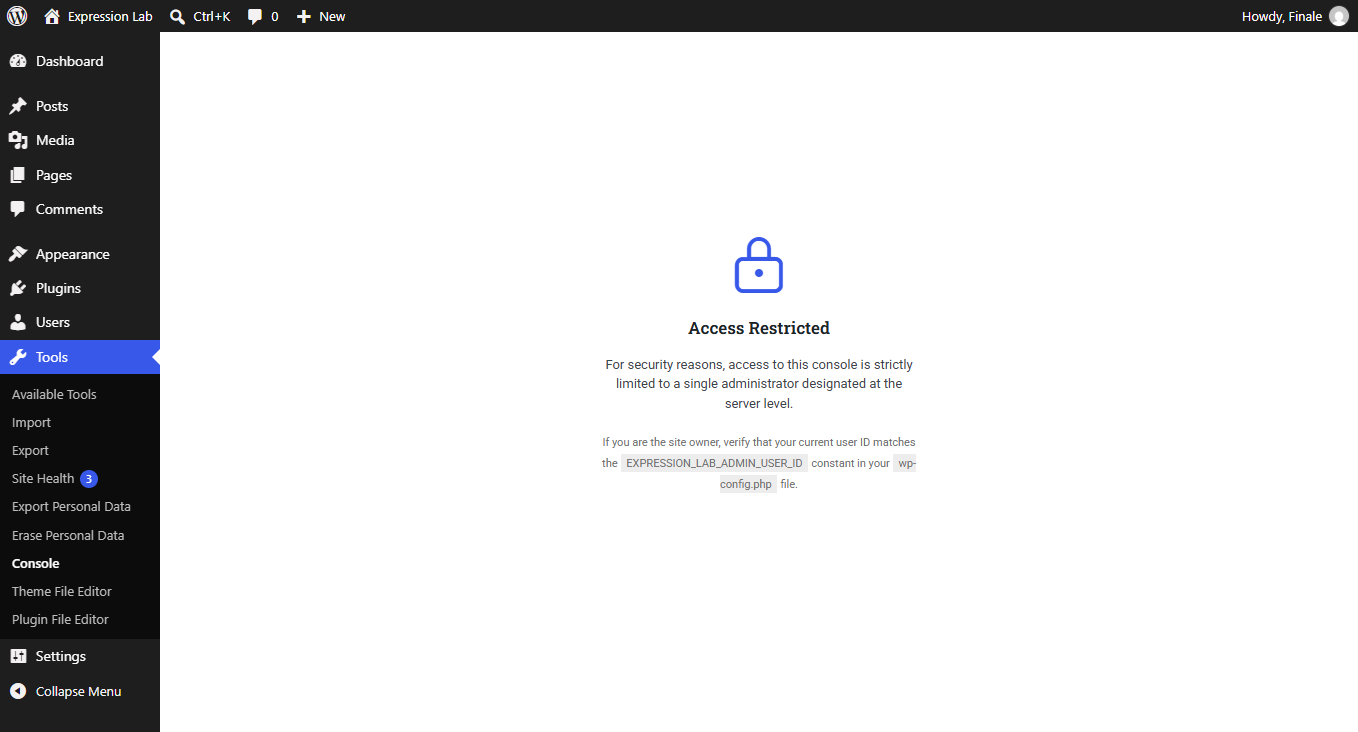
Unlocking Your Session
When accessing Tools > Console, you will be prompted with a lock screen:
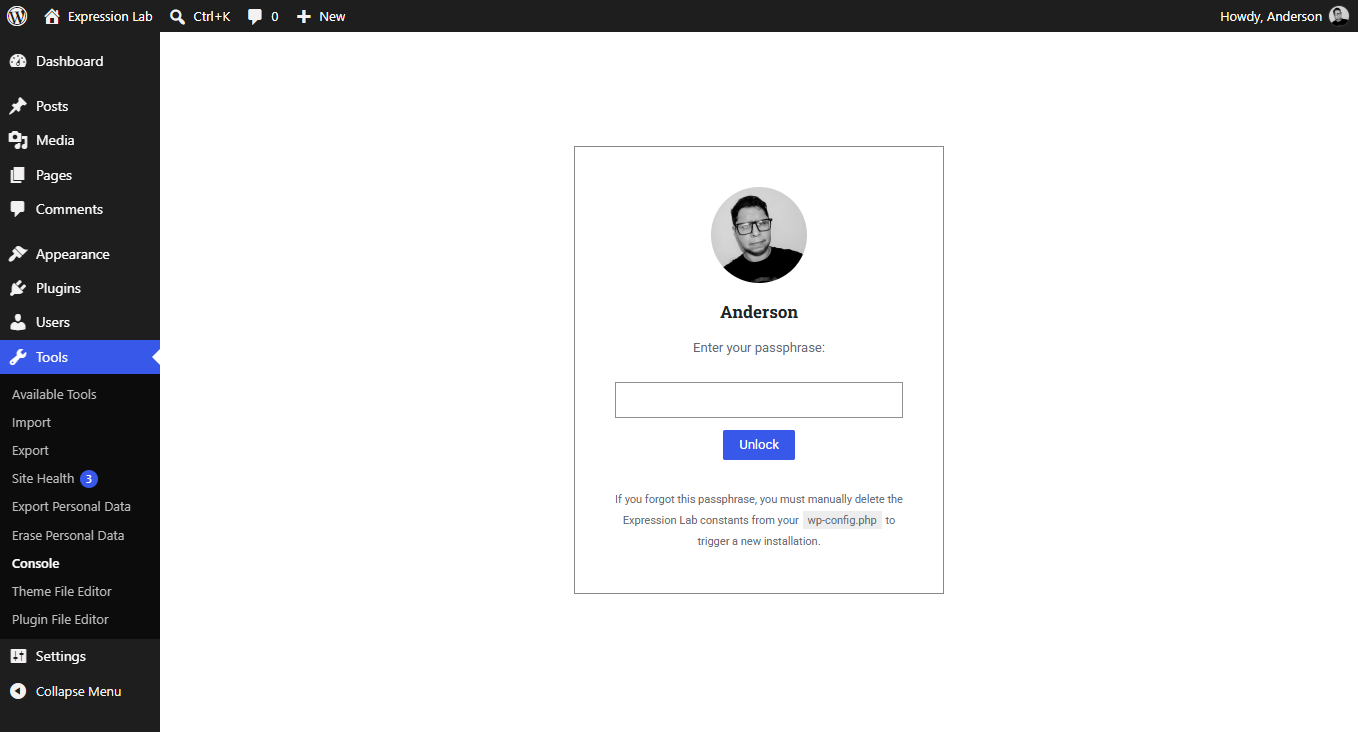
- Enter the passphrase you chose during the onboarding process.
- Click Unlock (or press Enter).
- The browser derives the session key in memory and establishes a signed session.
Using the REPL Console
The Expression Lab console provides an interactive development environment designed for real-time expression evaluation and data inspection.
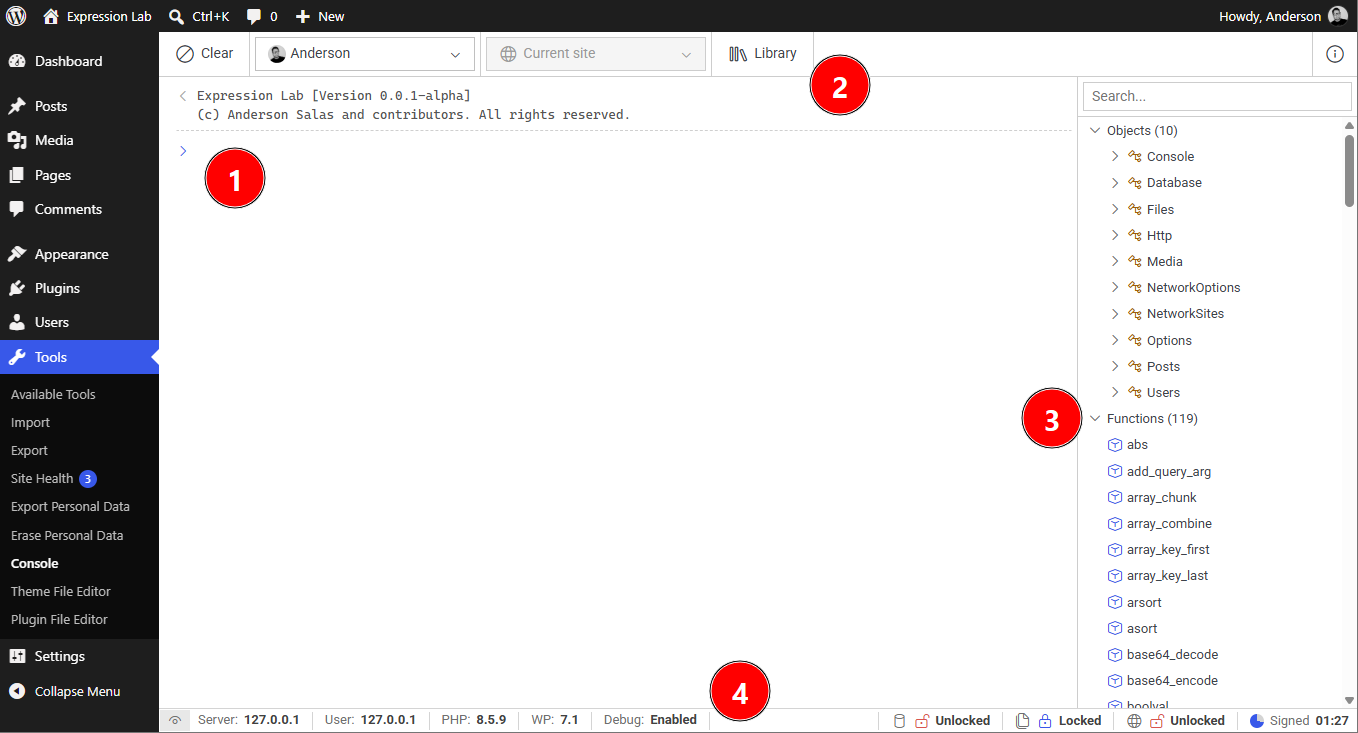
1. Editor and Expression Buffer
- Input Prompt: Type your DSL expression in the editor at the bottom of the console buffer.
- Execution: Press Enter to evaluate the expression.
- Multiline Mode: Press Shift + Enter to insert a newline without evaluating.
- History Navigation: Use Alt + ↑ and Alt + ↓ to cycle through previous commands.
- Re-evaluating / Editing: In the output buffer, click Edit input on any previous entry to load it back into the editor, or click Run code to re-evaluate it immediately.
2. Toolbar Controls
- Clear: Clears the console output history buffer and resets the editor.
- User Context Switcher (
User): Allows evaluating expressions in the context of another WordPress user account (changing the current user). - Site Switcher (
Site): (Multisite only) Switches the execution context to target a specific subsite in the network. - Snippet Library (
Library): Opens the snippet manager to save, load, import, or export reusable code snippets. Supports local disk storage via the browser's File System Access API. - About: Displays version information, licenses, and repository links.
3. Sidebar Outline Explorer
The collapsible sidebar on the right provides real-time documentation and code completion resources:
- Objects: Available global objects and classes.
- Functions: Available functions, parameters, and signatures.
- Constants: Available system and WordPress constants.
- Click to Insert: Clicking any item or function in the sidebar inserts its template into the editor prompt.
4. Status Bar (Footer)
The footer bar provides immediate visibility into your current runtime environment:
- Sensitive Info Toggle (
Eye icon): Masks or reveals server and client IP addresses. - Runtime Info: Displays active PHP version, WordPress version, and
WP_DEBUGstatus. - Read-Only Status Indicators: Shows whether write operations are restricted for the Database, Filesystem, and Network (e.g.,
Database: Locked). - Signature Status: Displays the remaining validity countdown for the current cryptographic session challenge.
Your First Expression
Once unlocked, verify that the console is operating properly by evaluating basic expressions:
2 + 2 * 10
Press Enter. The result will appear in the output log:
22
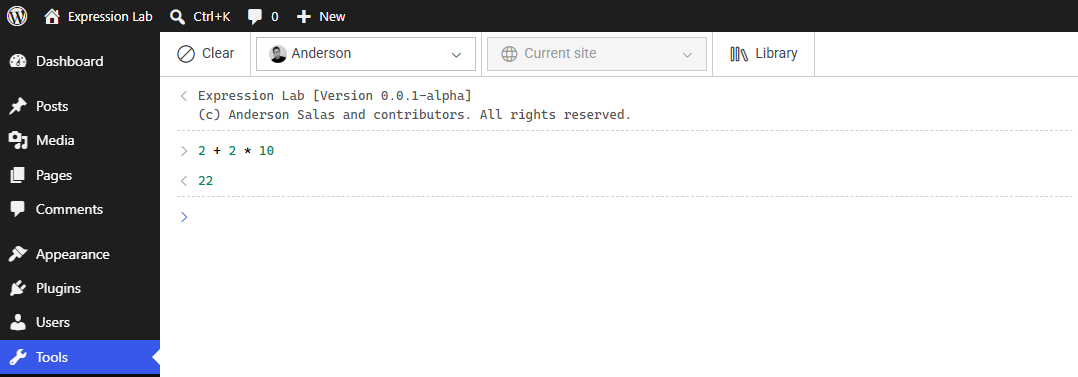
That's it! You can now use the console to evaluate expressions and inspect your WordPress environment.
Resetting the Configuration
If you need to change your passphrase or designate a different administrator:
- Open your
wp-config.phpfile in a text editor. - Remove or comment out the following constants:
wp-config.php// define( 'EXPRESSION_LAB_ADMIN_USER_ID', ... );// define( 'EXPRESSION_LAB_ADMIN_PUBLIC_KEY', '...' );// define( 'EXPRESSION_LAB_ADMIN_SALT', '...' );
- Save
wp-config.php. - Return to your WordPress admin dashboard and navigate to Tools > Console to restart the onboarding wizard.
Next Steps
- Read the Basic Syntax guide to explore available operators, functions, and expression grammar.